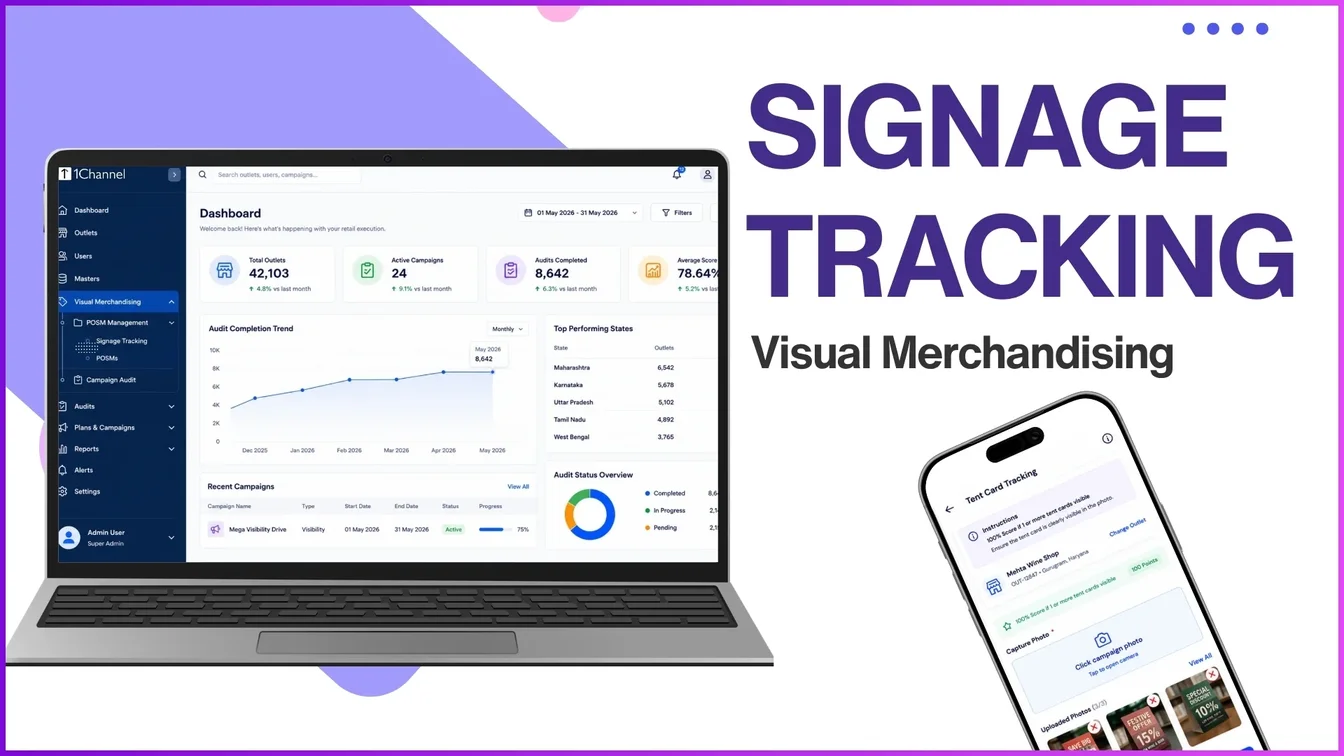
Getting point-of-sale material into the right stores is only half the job. The bigger challenge is knowing exactly which POSM went where, for how long, and whether it actually got deployed.
In most retail teams, this still runs through spreadsheets and WhatsApp confirmations, which makes it nearly impossible to reconcile what was allocated against what was actually installed.
A structured POSM allocation process, run through the desktop portal, solves this by turning POSM deployment into a code-based, trackable exercise, from registering the assets to tagging them against specific outlets.
Setting Up the POSM Foundation
Before any POSM can be allocated, it needs to exist as structured data in the system. This starts with two levels of classification:
- POSM Category, the broad grouping an asset belongs to (for example, Display, Competition tracking, or Soft POSM).
- POSM Type, the physical form the asset takes within a category, such as a banner, bunting, poster, standee, shelf strip, or shelf-in-shelf unit.
This two-level structure keeps the POSM library organized as the number of assets grows, and it's what makes filtering and reporting possible later.
Registering Individual POSMs
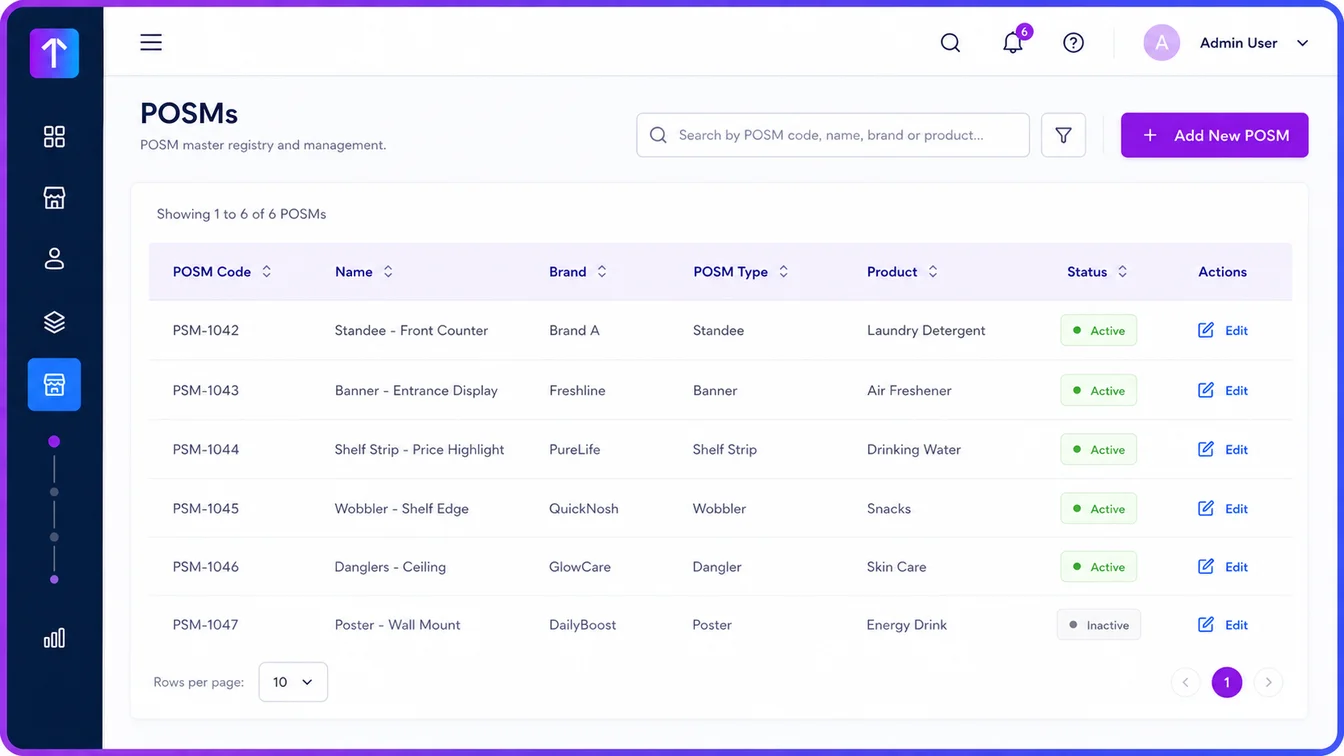
Once categories and types are in place, individual POSM assets are registered with their own code, name, associated brand, type, and linked product. Each one carries a status (active or inactive), so retired materials don't show up as allocatable options in the field.
This registry becomes the master list that any allocation later pulls from, every POSM that shows up on a field executive's phone traces back to a record created here.
Allocating POSMs to Outlets
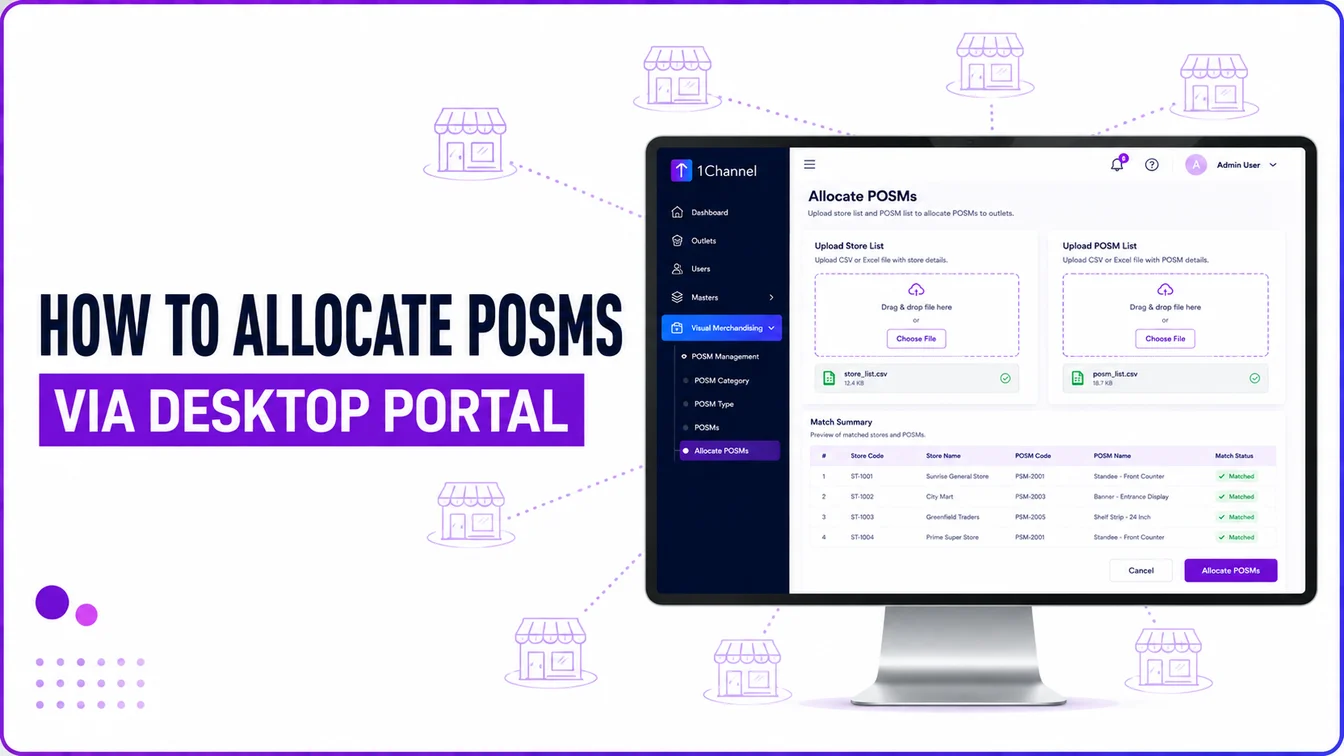
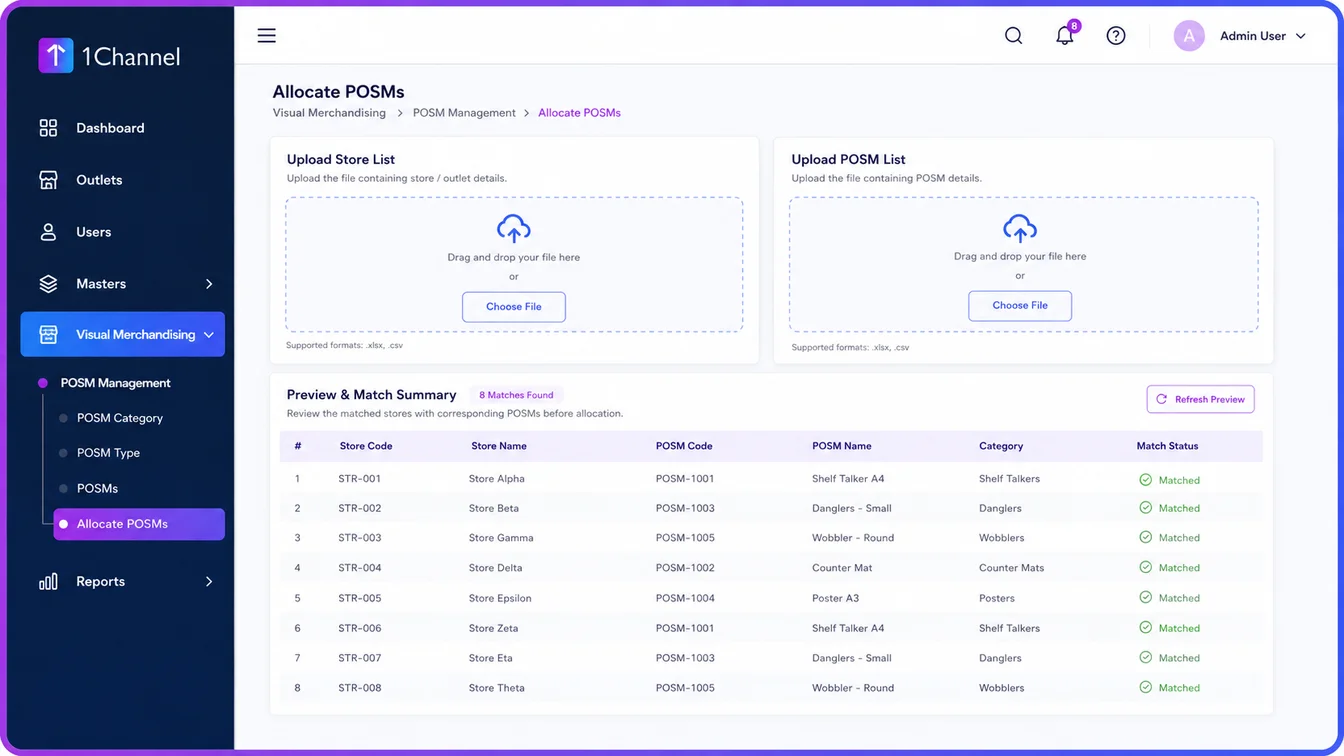
With the POSM registry ready, the actual allocation happens through a code-based upload:
- An admin uploads a store list, a file containing the outlet codes the allocation applies to.
- The admin uploads a POSM list, a file containing the POSM codes to be deployed.
- The system tags each store code against the relevant POSM codes for a defined duration.
Because both lists are just codes, this scales to hundreds of outlets and POSMs without needing to configure each pairing by hand.
Catching Errors Before They Reach the Field
Bulk uploads are only useful if bad data gets caught early. The portal automatically checks both files during upload and flags:
- Invalid store codes, codes that don't match any outlet in the system
- Invalid POSM codes, codes that don't match any registered POSM
These are auto-generated and filtered out of the upload, so a typo in a spreadsheet doesn't silently create an allocation that never reaches the right store.
What Happens After Allocation
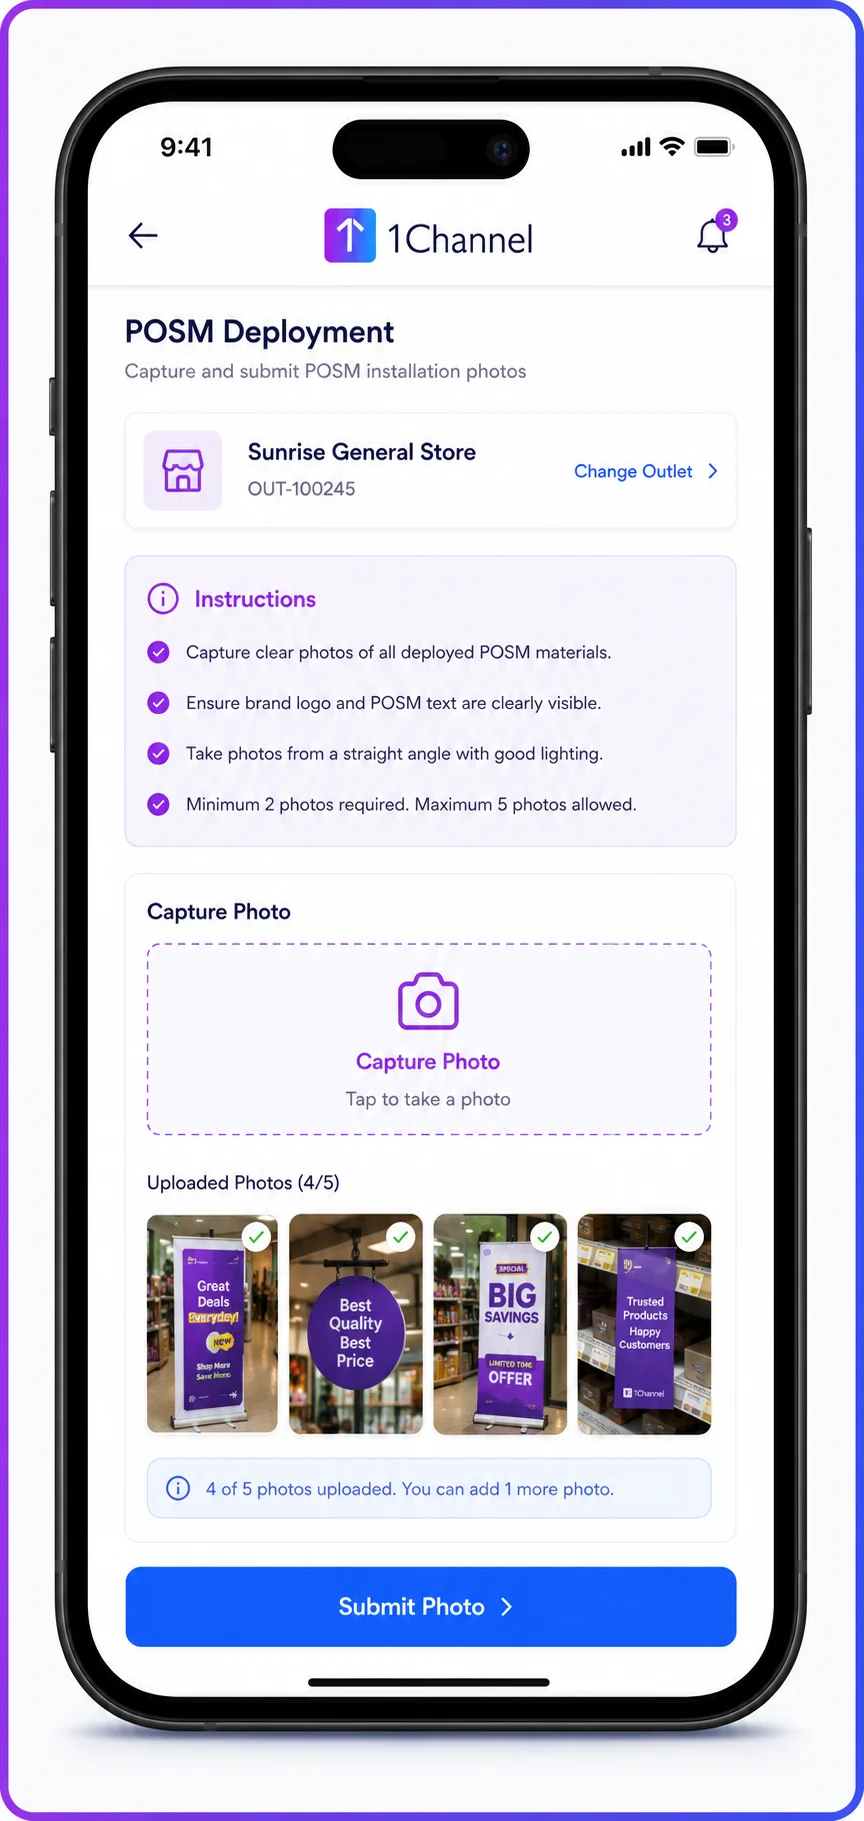
Once an allocation is saved, it doesn't stay static in the portal, it flows straight to the field. The relevant outlets start showing the assigned POSMs in the field executive's mobile app for the allocation's active duration. Field teams capture photo proof of each installed POSM, which becomes the basis for audit and compliance checks against what was originally allocated.
This closes the loop: what gets allocated from the desktop is what gets verified in the store.
Boosting Retail Execution with 1Channel
Bringing POSM registration, allocation, and field validation into a single platform is what turns POSM management from a spreadsheet exercise into a system of record.
Explore 1Channel Visual Merchandising & POSM Management
See how 1Channel's Visual Merchandising and POSM Management software handles POSM registration, allocation, and field validation from a single platform.
Explore Visual Merchandising →Conclusion
POSM allocation is where retail execution either gets structured or stays chaotic. By registering assets properly and allocating them through a code-based, validated process, teams get a clear, auditable link between what was planned and what actually happened at the shelf.
FAQs
1. What is POSM allocation in retail merchandising software?
POSM allocation is the process of assigning registered point-of-sale materials, such as banners, standees, or shelf strips, to specific stores for a defined duration, so field teams know exactly what to deploy where.
2. What needs to be set up before POSMs can be allocated?
POSM categories, POSM types, and individual POSM records need to be created first. Allocation pulls from this registry, so a POSM has to exist as a valid, active record before it can be tagged to any outlet.
3. How does code-based allocation work in the desktop portal?
Admins upload a store list and a POSM list as separate files. The system matches store codes against POSM codes and tags them together for the allocation's active duration, without requiring each pairing to be configured manually.
4. What happens if a store or POSM code is invalid?
The portal automatically checks uploaded files for invalid store codes and invalid POSM codes, filtering them out of the allocation so a data-entry error doesn't create a broken assignment.
5. How do field teams see POSMs once they're allocated?
Allocated POSMs appear directly in the field executive's mobile app for the relevant outlet, where the executive captures installation photos as proof of deployment.
6. Can an inactive POSM be allocated to a store?
No. Each POSM record carries a status of active or inactive, and inactive POSMs don't appear as allocatable options, which keeps retired materials out of new allocations.
Note: Software screens may vary based on your business structure and configured workflows.